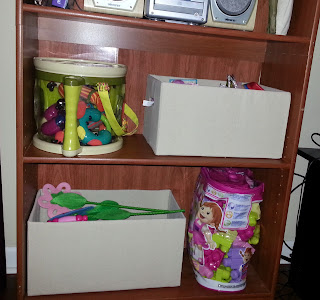
Christmas has left us with an abundance of toys and a shortage on storage space. We have a small house that quickly feels claustrophobic with clutter. And I like things to be tidy and organized. I went to Walmart yesterday to see if they had any baskets or totes that would work. The cheapest one was $20 and didn't look so great. So it was off to the interwebs to see if a more frugal solution could be found.
I found several tutorials for making canvas bins out of diaper boxes. Perfect! We have a million diaper boxes hanging out in the garage, and I actually had a canvas drop cloth out there too. I waited for DD to take a nap and then I got started. I read through several tutorials to get an idea of the process, and then changed things a bit. Mainly because I didn't want to get out the sewing machine to sew a basket liner. So my baskets are completely canvas covered.
No-Sew Canvas Bins
Materials:
Diaper boxes
Hot glue
Canvas drop cloth - or another sturdy fabric, approx 1 yard.
Tape measure
Scissors
Box knife
Iron
I started out with an empty box. Using the box knife I carefully cut off the top flaps and set them aside to use later.
Next I glued the short flaps inside the bottom to cover the gaps. One piece had to be trimmed to fit on my box.
Note: At this point I thought I might decoupage the outside of the box so I first covered it in white copy paper. Then I got impatient and decided to cover it with the canvas instead. So from this point on my boxes are covered in white paper but its a completely unnecessary step!
Now its time to measure the fabric. Here's where my tutorial starts to differ from the others. I didn't want to sew a fabric liner so I needed to have the fabric cover the outside and the inside. I thought the easiest way to do this would be to have two large strips - one to run length-wise (approx 11' x 52 '') and one to run width-wise (approx 18'' x 44'').
I set my box down on the canvas and measured allowing .5'' room on the sides to overlap. Once my strips were cut I ironed them smooth.
Then I began to wrap the box, starting length-wise. I turned the box over and started on the bottom. Centering the fabric, I began on one side and glued down the fabric, stretching it tight and pressing firmly into the glue.
I glued the bottom first, then each of the sides on the outside. Lastly I finished up by tucking the fabric inside and gluing it down. Don't worry about making it meet the bottom edge exactly. You want a bit of fabric left on the bottom of the box. It will be covered in the end.
Then I went back and glued down the sides, being careful to cut and tuck the corners to get them as smooth as possible.
For the next piece, I folded over the edges to get a nice, smooth seam and ironed it to keep the strip straight and uniform.
Again starting on the bottom in the middle, I began gluing down the fabric. Run the glue all the way to the edge and press firmly for a nice, tight seam.
Glue the bottom, outside walls, and then the inside.
Almost there! This is what the box should look like once it's fully wrapped
For the bottom, I used the two long flaps to make an insert. You could tape them together, but I was too impatient to go find the tape. It works fine without taping. Measure a piece of fabric to cover the flaps.
Glue down the fabric, stretching tight to get a smooth finish.
Now tuck the insert into the bottom of the box. It should be a snug fit. Press down well in all corners to secure it.
And that's it! This would work with almost any kind of fabric. A great way to reuse those diaper boxes (or paper boxes, or any other kind of box you may run across). DD has a bookshelf in her room that is just waiting to get some new bins! For now, I am thrilled to have the toys contained in the living room :)
I just made two more bins for DD's room during nap time. This may be one of my future baby-shower gifts. Buy a box of diapers, make a fun tote out of the box to match the new nursery, and then fill with the diapers from the box :)


